•
Tutorials: Adobe Photoshop: Outlined Text
This is my first real tutorial on adobe for all you people so I ask kindly not to duplicate this tutorial by any means. You are free to link to this page though :)
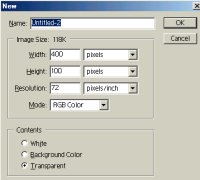 |
Start off by making a new file(Ctrl+N), any size you feel is enough for your text. I made mine 400 pixels in width and 100 pixels in height.
|
 |
The next step is to add your text, you do this by using the Text Tool(left read arrow on image) and selecting a font, size, color(right red arrow on image) then type something on there. For this tutorial I used a white "dbgtnet" text so you may not see it but it's there.
|
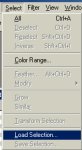 |
Now you need to select your text, you can do this by going to the "Select" category and then "Load Selection...". Simply click ok on the window that pops up and your text will be selected(broken outline).
|
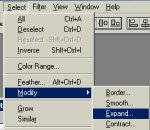 |
Now we start to create the outline for the text. Start by going to the "Select" category again then "Modify > Expand...", a window will pop up asking for the width of the outline enter the number 2 for this tutorial. You can change this next time to make it thinner or wider.
|
|
Create a new layer(Shift+Ctrl+N) by going to "Layer" category then "New > Layer...", click ok on the window that pops up. Make sure to move the layer under the text layer with your mouse.
|
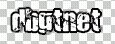 |
Now to add the color for the outline, obviously it shouldn't be the color of your text or else it wouldn't really be an outline would it. For this tutorial the background on your color selection should be black. Now fill in the selection on the new layer you created by pressing Alt+Backspace. You should now have a finished outlined text, use it wisely :D
|
Written by fRaNk, have any questions click here for contact info.
|