 |
 |
 |
|
 |
|
|
|
|
|
Main
Staff
link Us!
Affiliation
Get Hosted!
Free Web Templates!
Links
Mail Login!
Store
Gallery
Free Layouts!
Cgi-Scripts
Adobe Photoshop Tutorial



Clouded Crystals
1.First, open up a new image, any size will do. Make sure you background is white. 2.Press D to reset your foreground and bacground color. Now fill the picture with black. Then go to Filter>>Render>>Lens Flare and use these settings: Brightness: 100% Flace Center: Put the light in the center or close to it Lens Type: 50-300 Zoom This is how your image should look so far.... 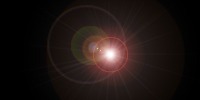 3.Now, go to Filter>>Artistic>>Fresco and use the settings below for the best results: Brush Size: 2 Brush Detail: 8 Texture: 1 So it will look like this... 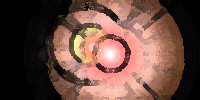 4.Then, go to Filter>>Stylize>>Extrude and use these settings or it will look wierd: Type: Pyramids Size: 20-25 pixels (If it is a small image, 5-15 pixels. I used 5) Depth: 255 and Random Leave the rest as they are. So, we should get a beautiful image like this... 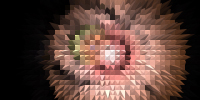 5.Now create a new layer by pressing Ctrl+Shift+N. Then press, Ctrl+Backspace to clear the image. Now, pick a color that you want your crystals to be. I chose a nice blue. Fill in the empty image with that color. Then go to the "Layers" palette and choose "Color. Now your image should be the color you chose. Here is my example... 6.Now, press Ctrl+Shift+N so that will create a new layer. Set the opacity around 40 or 50. Now choose a foreground color and leave the background color white. I used a dark purple to rival blue. Go to Filter>>Render>>Clouds. It should look like the color you chose... That's all there is to it!! You could add some effects or differe the clouds effect. Whatever you want to do!!! Tutorial by staff member: SlipKnot { Back } {BookMark} {Set As Hompage} { Forward } |


